

Want to create your own Tesla API application? This guide walks you through it in a few minutes — no coding required, and no credit card needed.
What is the Tesla Fleet API?
Since Tesla retired the old owner API, every app that reads your vehicle data or sends commands must use the Tesla Fleet API through a registered developer application (with a Client ID and Client Secret). Creating that application is what this guide covers. Once it’s set up, you can use it with a self-hosted TeslaMate, Home Assistant, evcc or your own scripts — and Tesla even grants a $10/month usage credit to developer accounts.
1. Create a Tesla developer account
You must create a Tesla developer account and submit a new application.
- Register as a Tesla developer with your Tesla account
- Submit a “New Request” from the dashboard

Well done — you’re ready to create your application.
2. Create your own Tesla API (6 easy steps)
MyTeslaMate provides all the endpoints you need to create your Tesla API application. Once it’s created, you’ll be able to use it in TeslaMate, Home Assistant, or anywhere else.
- Link your application with your profile
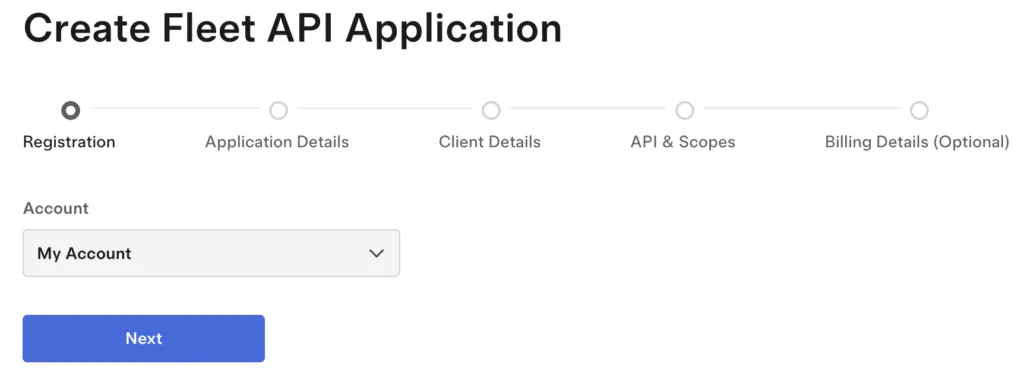
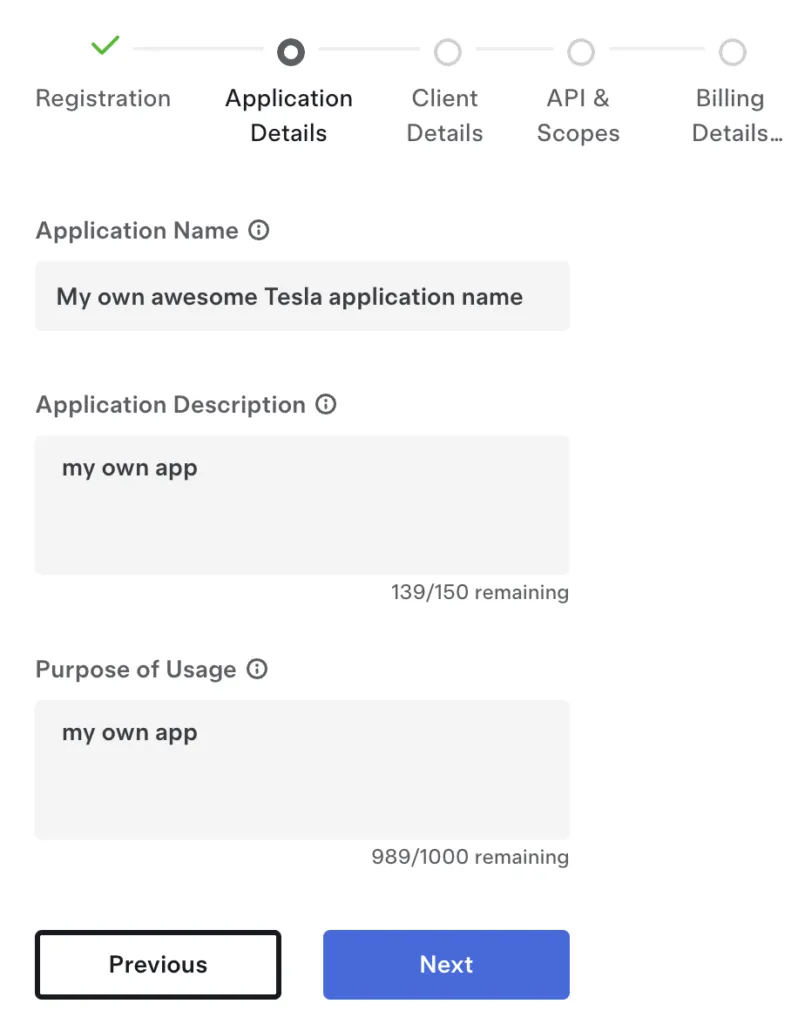
- Fill in the application name, description and purpose of usage. You can write whatever you want.
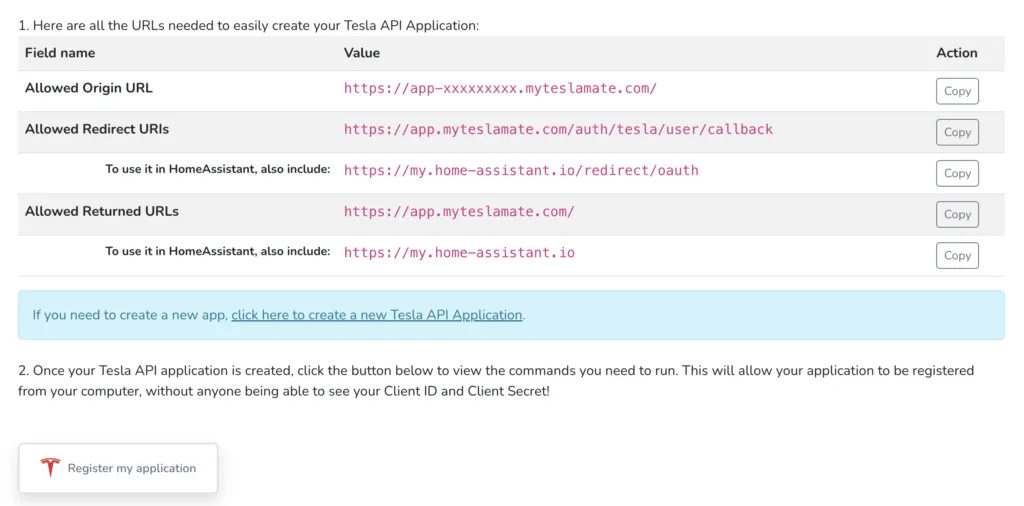
- Open a tab on https://app.myteslamate.com/tesla to copy your own URL(s)
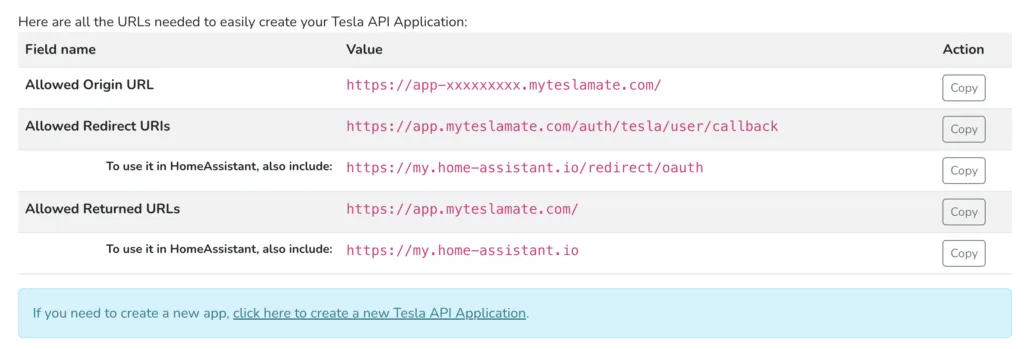
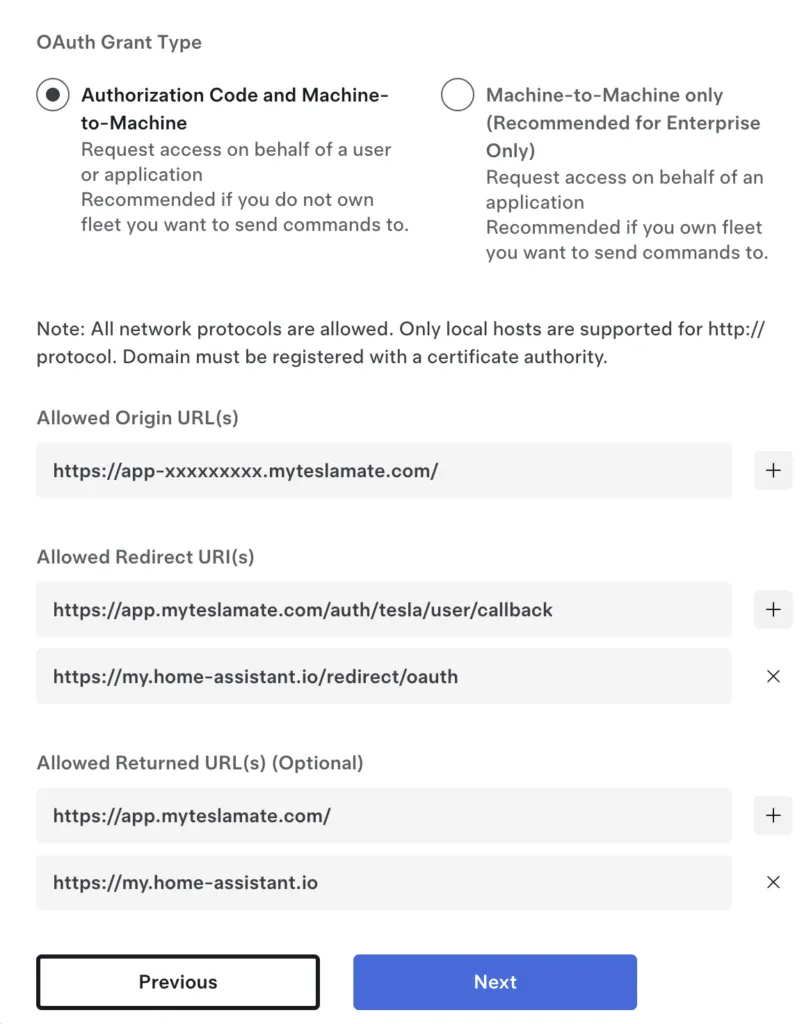
- Paste the URLs into the matching fields.
Only include my.home-assistant.io if you think you’ll use it.
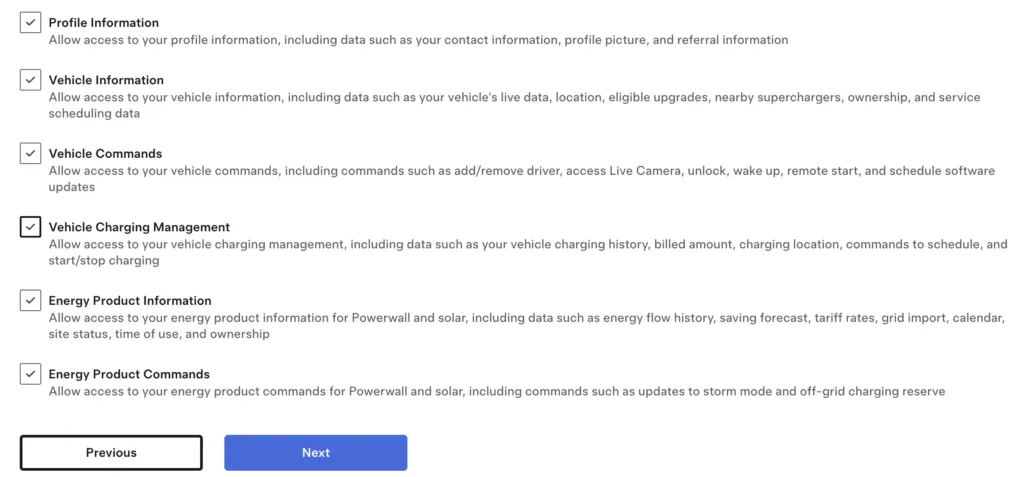
- Check (all) the scopes to allow in this API application
- Skip and Submit — do not register a credit card!

Keep the Client ID and Client Secret somewhere safe, you’ll need them later.
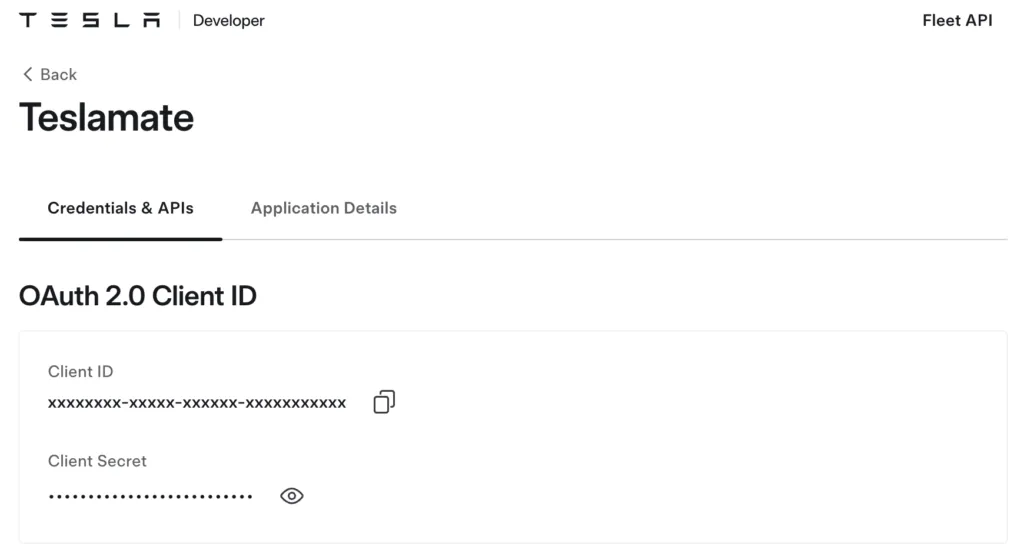
Great — you created your first Tesla API application! You should receive a validation email from Tesla. Next, register this application so you can use it.
What happens after you submit?
Tesla reviews new applications automatically, usually within a few minutes to a couple of hours. You’ll get a validation email confirming your application is active. If it doesn’t arrive:
- Check the spam folder of the email tied to your Tesla account.
- Make sure the public-key and redirect URLs you pasted in step 4 are exactly the ones from your Tesla API page.
- Wait a little longer — approval can occasionally take up to 24 hours.
3. Register this application
You must now register your application and log in once to use it:
- On your own API page, click “Register my application”
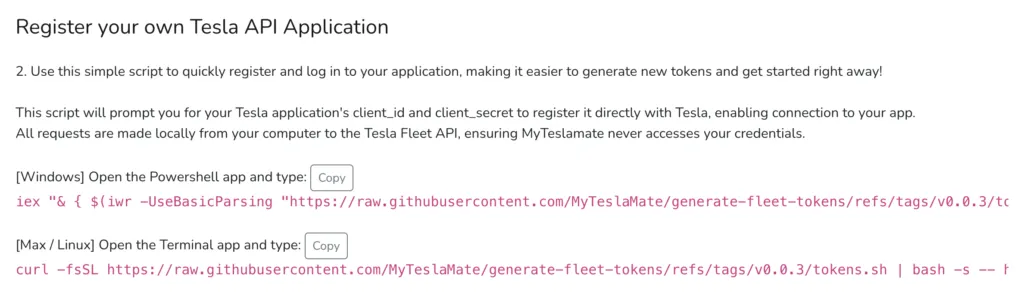
- Run the script to register your application and generate credentials from your computer — your secret is shared only with Tesla. You can view the code on this GitHub repository and improve it if you like.
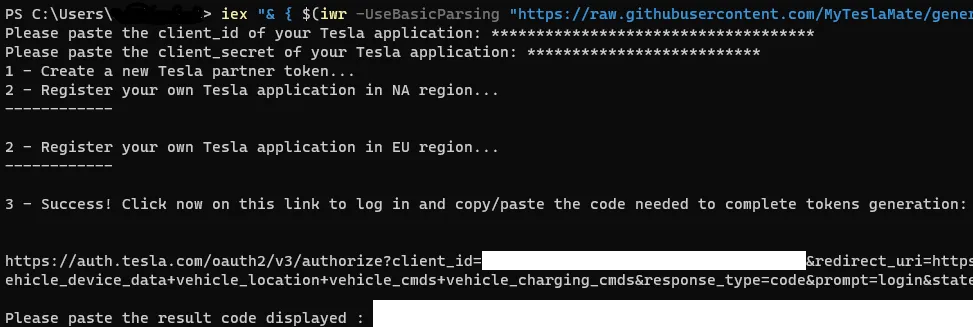
- Execute the script. At step 3, click the login link to get the code to paste from MyTeslaMate
After the Tesla login, the code is displayed in the green block.
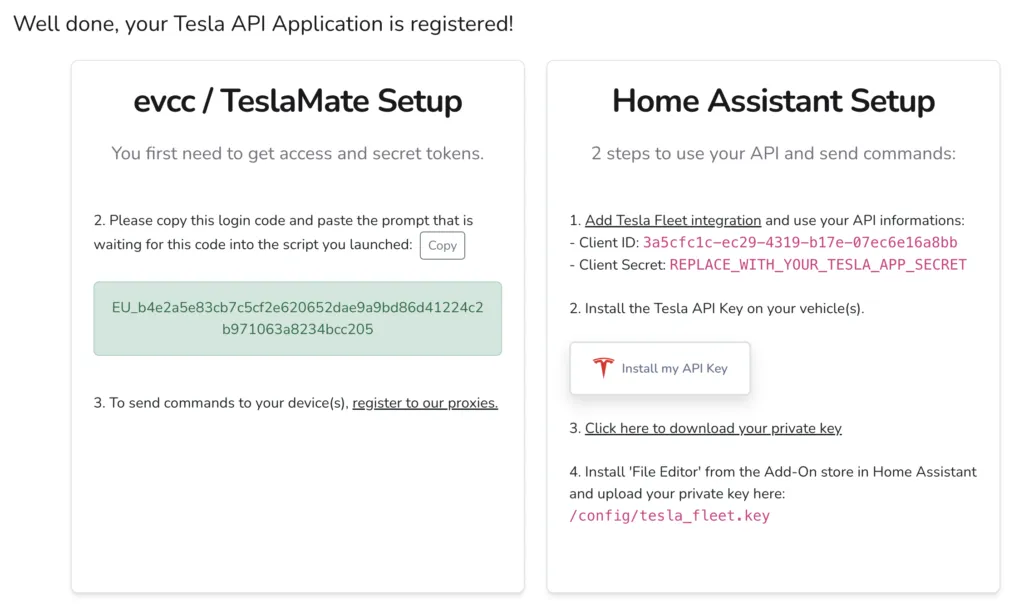
- That’s the end of the script — you can now copy/paste your new tokens
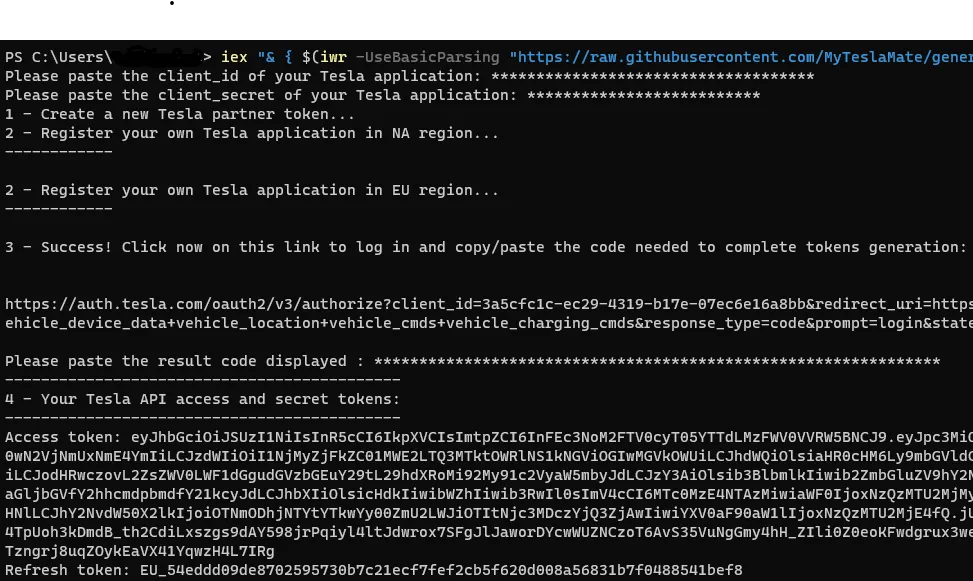
You’re now using your own Tesla API directly, for free!
4. Usage
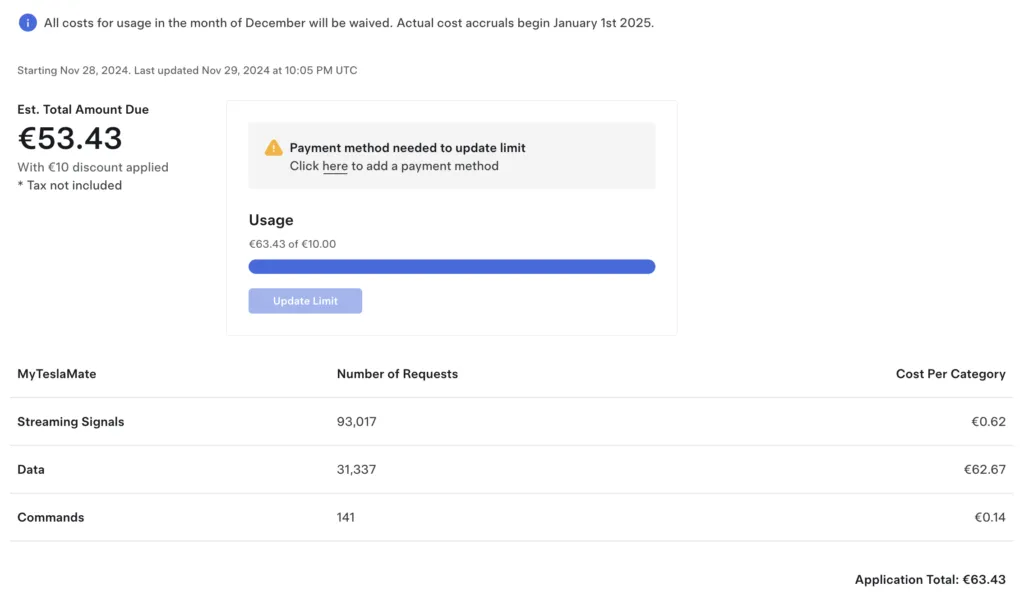
You can watch your usage on the Tesla Developer website.
Go to the Tesla API dashboard to control costs. Tip: normal use stays well below the free $10/month credit — you should never come close to the volume shown in this example.
You can use your own API from a self-hosted TeslaMate, evcc, Home Assistant, and more.
You can also log in to MyTeslaMate with your Tesla account to use our proxies via the Fleet page — you’ll be sending commands to your vehicle(s) in a minute!