

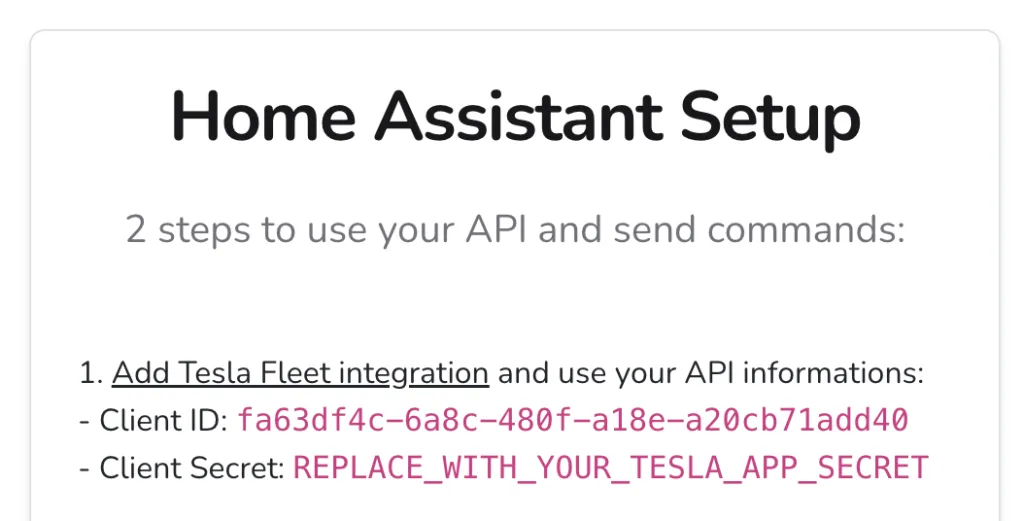
Since Tesla retired the old owner API, controlling your car from Home Assistant requires your own Tesla Fleet API application — with a Client ID, a Client Secret, and a signed command proxy. That used to mean hours of setup. With MyTeslaMate, you can have it running in just two steps, no coding required:
- Step 1 — Create your own Tesla API (Client ID & Secret)
- Step 2 — Connect it to Home Assistant
Why you need your own Tesla Fleet API
In late 2023 Tesla shut down the legacy owner API that older integrations relied on. Every app that talks to a Tesla today must use the Tesla Fleet API, and Tesla requires each command to be cryptographically signed by a registered application that hosts its own public key. In practice that means you need three things:
- A Client ID and Client Secret from a registered Tesla developer application.
- A public key published at a fixed URL on your own domain.
- A command proxy that signs every request before it reaches Tesla.
Running all of that yourself is possible but tedious. MyTeslaMate hosts the public key, signs the commands, and proxies the requests for you — so Home Assistant only ever needs your Client ID, your Client Secret, and your personal subdomain.
1. Create your own Tesla API
You first need to create a Tesla API application. MyTeslaMate handles the hard parts — hosting your public key, signing commands, and proxying requests to Tesla — so you don’t have to run any of that yourself.
Follow our guide to register your Tesla API in a minute, then open the Home Assistant setup on your Tesla API page.
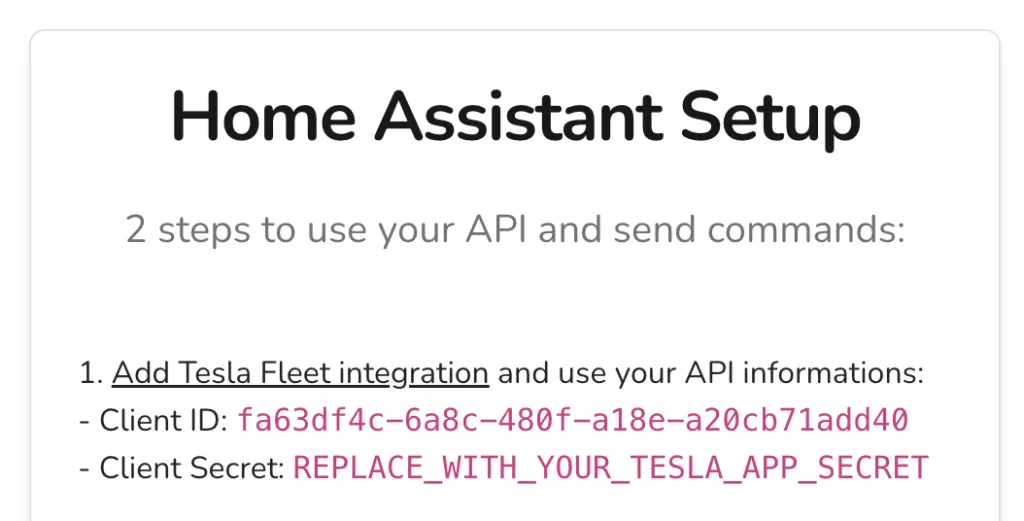
Well done — you’re ready to use your Tesla API in Home Assistant.
2. Your own Tesla API in Home Assistant
In about a minute, you’ll be able to monitor and control your Tesla directly from Home Assistant:
- Add the official Tesla Fleet integration (go to Settings > Devices & services > Add Integration > Tesla > Tesla Fleet) and paste the Client ID and Client Secret from the previous step.
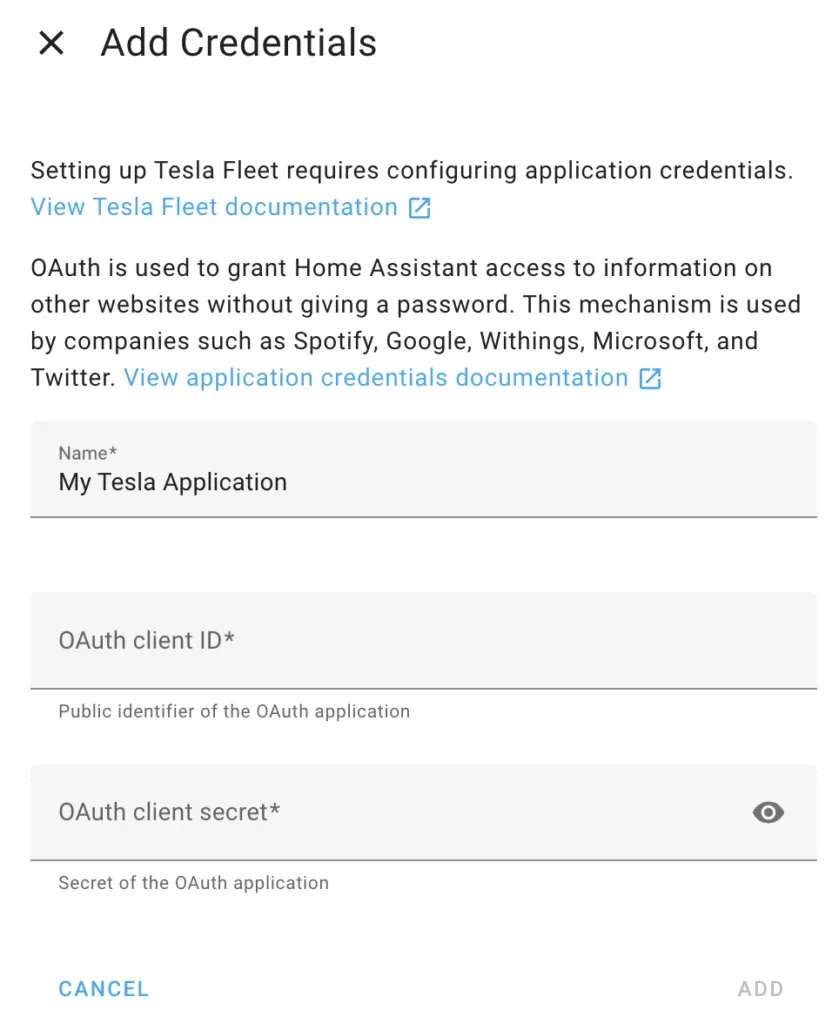
- After signing in with Tesla, enter your personal subdomain using this format:
app-xxxxx.myteslamate.com
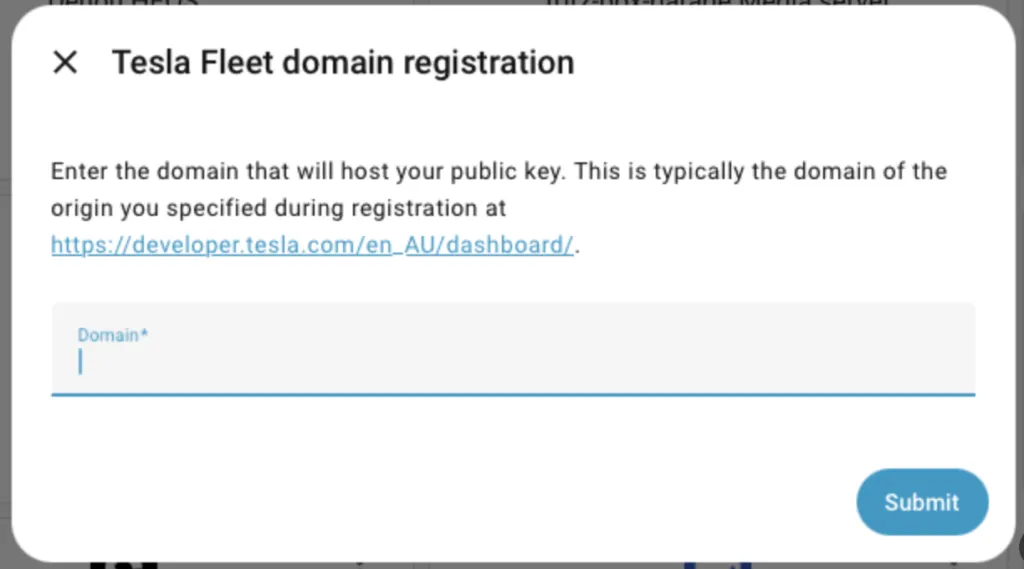
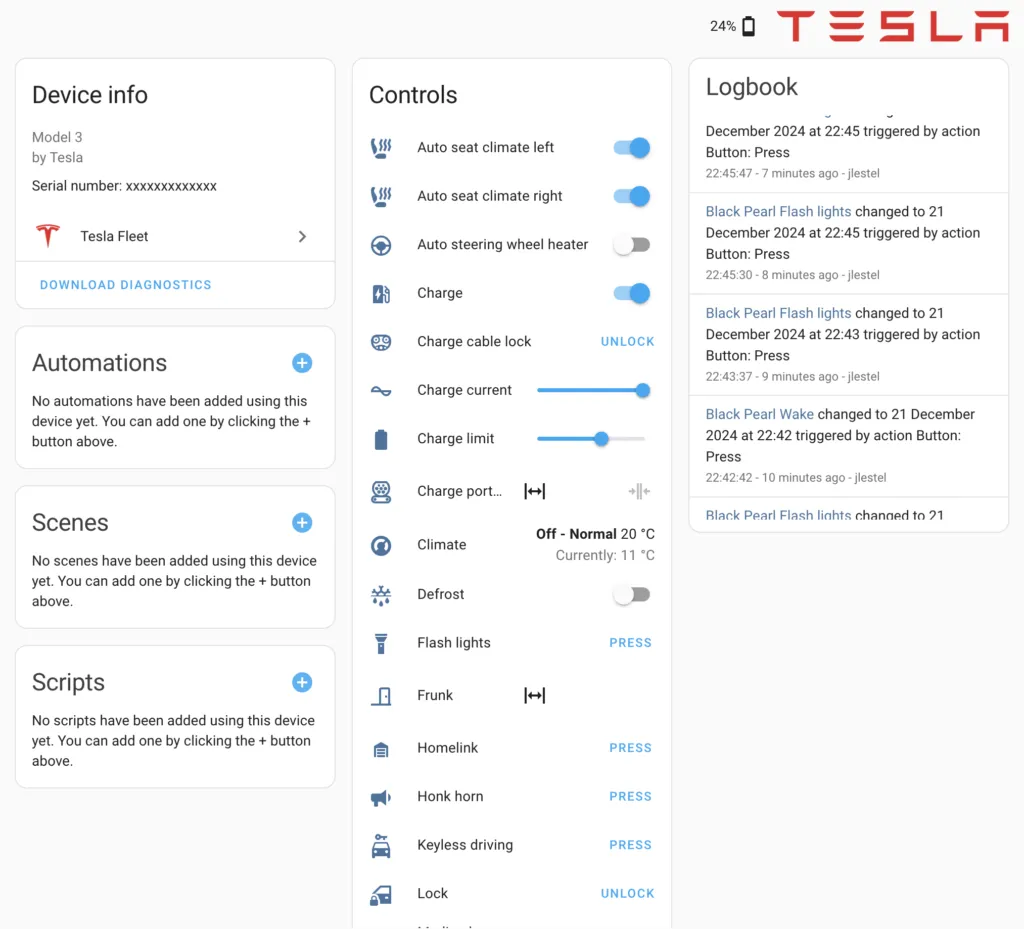
- You can now view your vehicle(s) in Home Assistant.
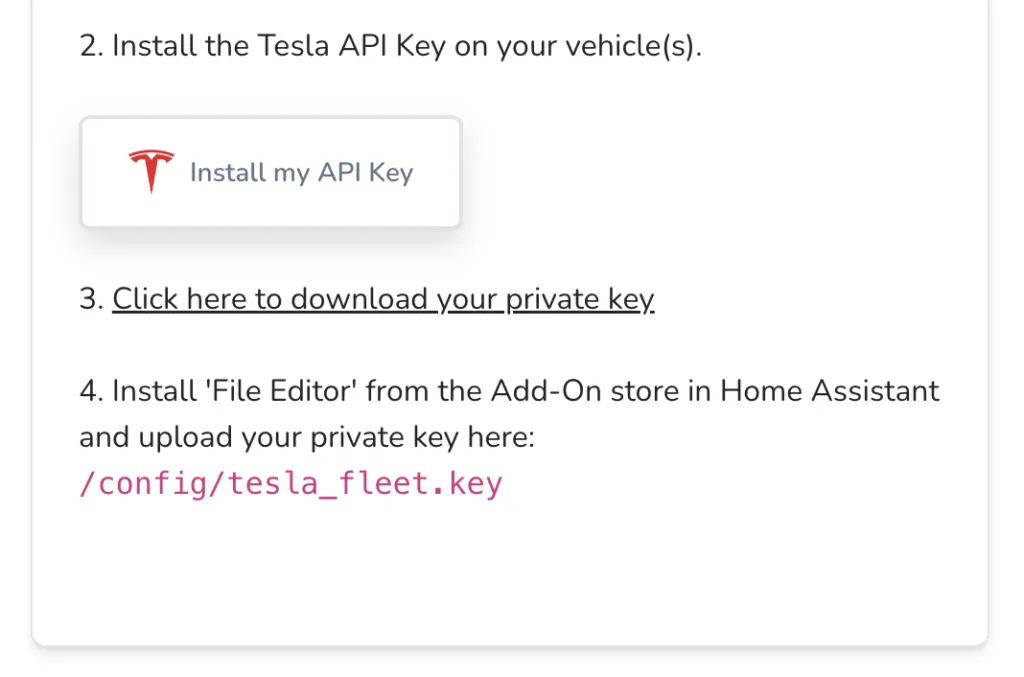
- To send commands (lock, climate, charging, and more), you need to:
- install your API on your vehicle from MyTeslaMate, and
- download your private key and copy it to Home Assistant. Upload the file to this path:
/config/tesla-fleet.key
Great — your Home Assistant is now linked with your Tesla API application! From here, every Tesla entity is available for your automations, dashboards, and scripts.
What you can control from Home Assistant
Once the Tesla Fleet integration is connected, Home Assistant exposes your car as dozens of entities. The most useful ones:
- Charging — start/stop charging, set the charge limit, adjust the charging current, and open or close the charge-port door.
- Climate — turn the climate on/off, set the target temperature, enable cabin overheat protection, and heat the seats or steering wheel.
- Security — lock/unlock the doors, toggle Sentry Mode, flash the lights, and honk the horn.
- Openings — vent or close the windows, and open the frunk or trunk.
- Live data — battery level, range, charging state, inside/outside temperature, odometer, and location (
device_tracker).
Every one of these is a standard Home Assistant entity, so you can drop them on a dashboard, expose them to voice assistants, or use them as triggers and actions in automations.
Automation examples
Here are three automations Tesla owners set up most often. Replace my_tesla with your vehicle’s entity slug.
Set the charge limit to 80% when you get home:
automation:
  - alias: "Tesla – 80% charge limit at home"
    trigger:
      - platform: zone
        entity_id: device_tracker.my_tesla_location
        zone: zone.home
        event: enter
    action:
      - service: number.set_value
        target:
          entity_id: number.my_tesla_charge_limit
        data:
          value: 80
Get a notification when charging is complete:
automation:
  - alias: "Tesla – charging complete"
    trigger:
      - platform: state
        entity_id: sensor.my_tesla_charging
        to: "Complete"
    action:
      - service: notify.mobile_app
        data:
          message: "Your Tesla is fully charged 🔋"
Preheat the cabin 30 minutes before your morning commute:
automation:
  - alias: "Tesla – preheat before commute"
    trigger:
      - platform: time
        at: "07:30:00"
    condition:
      - condition: state
        entity_id: binary_sensor.workday_sensor
        state: "on"
    action:
      - service: climate.turn_on
        target:
          entity_id: climate.my_tesla_climate
Troubleshooting
A few issues come up often — here’s how to fix them fast:
- Commands fail or entities are read-only. You haven’t installed the virtual key on the car. Install your API on the vehicle from MyTeslaMate, then copy your private key to
/config/tesla-fleet.keyand restart Home Assistant. - “Invalid subdomain” or connection errors. The subdomain must be exactly
app-xxxxx.myteslamate.com(with theapp-prefix and nohttps://). - Entities show unavailable. The car is asleep. Tesla only reports fresh data when the vehicle is awake; use the wake button sparingly, since frequent polling drains the 12V battery and burns API credits.
- It worked, then stopped after a while. Your Tesla token expired. Re-authenticate the integration from Settings > Devices & services > Tesla Fleet > Configure.
Frequently asked questions
Do I need a MyTeslaMate subscription to use Home Assistant?
No. Creating your own Tesla API and connecting it to Home Assistant through our proxy is free. A subscription only adds the hosted TeslaMate dashboards, backups and support.
Does this replace TeslaMate?
No — it’s complementary. TeslaMate logs and visualizes your history; the Home Assistant integration lets you control the car and build automations. Many owners run both side by side.
Why does my car need a “virtual key”?
Tesla requires every command to be cryptographically signed. Installing the virtual key (your API on the vehicle) authorizes MyTeslaMate’s proxy to sign commands, which is what lets Home Assistant lock the doors, start charging, and so on.
Will Home Assistant keep my Tesla awake?
Only if you poll it too aggressively. The integration reads cached data when the car is asleep and lets it sleep by default. Avoid automations that wake the car every few minutes.
Feel free to share your feedback by chat :)